
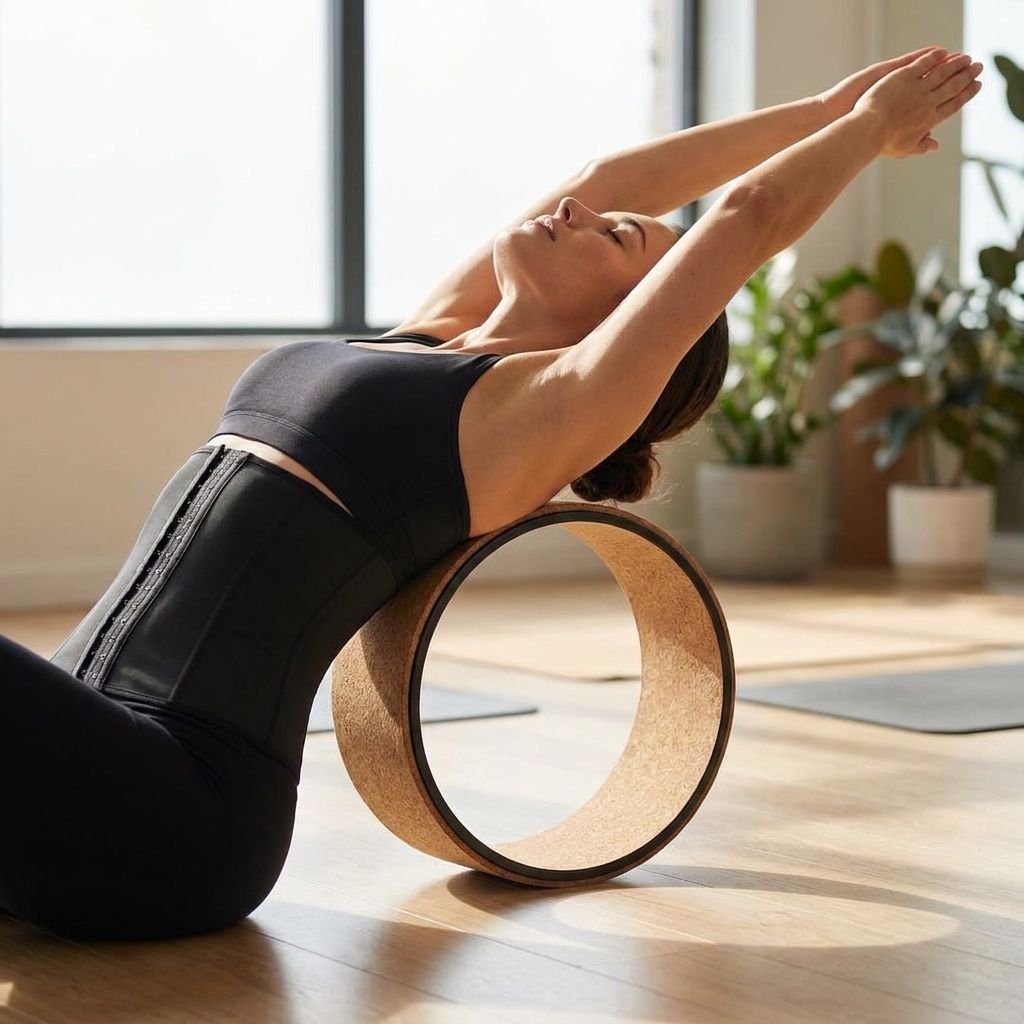
A yoga wheel gives you leverage a foam roller can't match, turning stiff thoracic vertebrae and locked-up hip flexors into a 10-minute daily fix instead of a chronic ache you just live with. This guide walks through the exact sequence to use a yoga wheel for back pain and flexibility, plus the mistakes that turn a recovery tool into a strain risk.
- A 10-15 minute daily yoga wheel routine loosens thoracic tension and improves spinal flexibility within 2-3 weeks of consistent use.
- Start with 20-30 second holds on the chest opener stretch before progressing to full spinal rolls in 2026.
- Skip the wheel entirely if you have acute disc herniation or unmanaged osteoporosis — check with a physical therapist first.
- Fitnessplowsurge's 13-Piece Yoga and Pilates Kit and Alignment Yoga Mat pair well with wheel work for grip and floor stability.
- Most soreness after a first session is normal; sharp or radiating pain down a leg is not.
Why this matters
Most desk-bound backs aren't weak, they're stuck. Hours in a seated position shorten hip flexors and round the thoracic spine, and stretching alone rarely reverses that because you can't actively load a muscle you're passively pulling on. A yoga wheel solves this by supporting your body weight through an arc of motion, so the extension happens under control instead of through gravity alone.
This is different from a static stretch or a massage gun. The wheel forces your spine through flexion and extension patterns most people haven't practiced since childhood, and that range of motion is what keeps lower back pain from becoming a recurring problem in 2026 rather than a one-off flare-up. Fitnessplowsurge stocks recovery equipment built for exactly this kind of home routine, which matters when a physical therapy copay isn't in the monthly budget.
What you'll need
- One yoga wheel, roughly 12-13 inches in diameter (the standard size fits most adult torsos)
- A yoga mat or folded towel for knee and hand padding
- 10-15 minutes of uninterrupted floor space
- Comfortable, non-restrictive clothing — jeans and the wheel don't mix
- Optional: a second, smaller wheel for hip and hamstring work once the basics feel stable
If you're setting up a home stretching corner for 2026, a non-slip mat is worth adding to the list before the wheel itself. A wheel rolling on a slick hardwood floor is how first-timers end up flat on their back for the wrong reason.
The steps
1. Warm up the spine first
Don't put weight on the wheel cold. Spend two minutes on cat-cow stretches on hands and knees, moving slowly through 8-10 reps, to get synovial fluid into the joints you're about to load.
Skipping this step is the single biggest reason people report soreness the next day. Common mistake: jumping straight into a deep backbend on a stiff spine — that's how you strain a muscle instead of stretching it.
2. Test your range with a seated roll
Sit on the floor with the wheel behind you, hands resting lightly on top of it. Roll it a few inches back and forth without leaning your full weight on it yet.
This tells you where your current limit is before you commit body weight to the stretch. If the wheel wants to shoot out from under you, that's a signal your core isn't braced enough for the next step.
3. Open the chest and thoracic spine
Lie back over the wheel with it positioned at your mid-to-upper back, knees bent, feet flat. Let your arms drop overhead and hold for 20-30 seconds, breathing into your ribcage rather than holding your breath.
This is the move most people picture when they think of yoga wheel for back pain, and it's the one with the clearest payoff: it directly counters the forward hunch from laptop and phone posture. Expected outcome: a noticeable release across the upper back within the first 30 seconds, not sharp pain.
4. Release the hip flexors
Kneel with one foot forward in a lunge, wheel positioned under the back knee or ankle for support, and sink your hips forward slightly. Hold 20-30 seconds per side.
Tight hip flexors pull the pelvis forward and load the lower back, so this step matters as much as the chest opener even though it doesn't feel like a "back" stretch. Skip it and your lower back pain will keep coming back regardless of how much thoracic work you do.
5. Roll under the feet for a forward fold
Sit with the wheel under both feet, legs extended, and hinge forward from the hips while rolling the wheel slightly toward you. Hold 15-20 seconds.
This targets hamstring tightness, which is a hidden contributor to lower back strain because tight hamstrings tilt the pelvis and flatten the natural lumbar curve. Common mistake: rounding the upper back to force a deeper fold — hinge from the hips instead.
6. Progress to a full spinal roll
Once steps 1-5 feel comfortable across a few sessions, lie back over the wheel positioned at the lower-to-mid back and let it roll slowly from your tailbone toward your shoulder blades, controlled the entire way.
This is the advanced move and it's where most flexibility gains happen, but it's also where bad backs get worse if attempted too early. Only progress here after at least a week of consistent practice with the static holds above.
7. Cool down and set a schedule
Finish with 60 seconds of gentle cat-cow to neutralize the spine, then note how your back feels the next morning before adding volume.
Consistency beats intensity here — five sessions of 10 minutes a week outperform one 45-minute session that leaves you sore for three days. Build from 5-10 minutes daily toward 15 minutes by the third week of 2026 training.
Troubleshooting
- Sharp pain instead of a stretch sensation: stop immediately. A dull, releasing feeling is normal; anything sharp or radiating down a leg means the wheel is loaded past your current range — back off to the seated roll test.
- Wheel slides out from under you: you're likely rushing the transition into the backbend. Use a mat with grip and lower yourself slowly, bracing your core before you release weight onto the wheel.
- Dizziness after chest opener stretches: this usually means the hold was too long for a first session or your breathing was shallow. Cut hold time to 15 seconds and breathe deeply through the stretch.
- Hips won't reach full extension in the flexor release: don't force depth. Hip flexor tightness from years of sitting takes weeks to loosen, not one session — hold shallower and let range build gradually.
- Lower back feels worse the next day, not better: you likely skipped the warm-up or jumped to the full spinal roll too early. Drop back to static holds for a week before trying the roll again.
- Wheel feels unstable on carpet: thick carpet lets the wheel dig in unevenly. Move to a mat on a hard floor or a thin rug instead.
Tools and resources
A yoga wheel does more work when it's part of a small, purpose-built setup rather than a lone purchase. A grippy mat keeps the base stable during rolls, a lightweight kit adds resistance bands for the hip work in between wheel sessions, and a massage roller handles the muscles the wheel can't reach directly.


“A dull, releasing feeling is normal on a yoga wheel; anything sharp or radiating down a leg means you're loading it past your current range.”
What to do next
Run the seven-step sequence above three to five times a week for two weeks before judging results — flexibility work compounds, it doesn't spike overnight. Once the static holds feel easy, add the full spinal roll and a second, smaller wheel for isolated hip and hamstring sessions. Home fitness equipment like this only pays off with a schedule attached to it, not a one-time try.
FAQ
How do you use a yoga wheel for back pain?
Lie back over the wheel positioned at your mid-to-upper spine, let your arms drop overhead, and hold the stretch for 20-30 seconds while breathing into your ribcage. Build from static holds to full spinal rolls only after a week of consistent practice.
Is a yoga wheel good for lower back pain specifically?
Yes, when used with hip flexor and hamstring releases alongside spinal extension, since tight hips and hamstrings tilt the pelvis and load the lower back. Skip the deep spinal roll until you've built comfort with basic holds.
How often should you use a yoga wheel?
Three to five sessions a week of 5-10 minutes each builds flexibility faster than one long session, since consistency drives the range-of-motion gains. Extend to 15 minutes daily by week three once your body adapts.
Can a yoga wheel make back pain worse?
It can if you skip the warm-up or jump straight to a full spinal roll on a stiff back. Sharp or radiating pain is a stop signal; a dull stretch sensation is the normal response.
What size yoga wheel should beginners buy?
A standard 12-13 inch wheel fits most adult torsos and is the right starting point before adding a smaller second wheel for hip and hamstring isolation work.
Do you need a mat to use a yoga wheel?
A grippy mat or thick towel is strongly recommended, since a wheel on a slick hard floor can slide out from under you mid-stretch. Carpet can also cause uneven instability during rolls.
How long until a yoga wheel improves flexibility?
Most people notice looser thoracic movement and reduced morning stiffness within 2-3 weeks of daily 10-15 minute sessions in 2026. Full spinal roll comfort typically takes longer, closer to 4-6 weeks.
Should you avoid a yoga wheel with certain conditions?
Anyone with acute disc herniation, unmanaged osteoporosis, or recent spinal surgery should get clearance from a physical therapist before starting. The wheel loads the spine through extension, which isn't appropriate for every back condition.
One last thing
The chest opener stretch in step 3 does more for posture in one 30-second hold than most people get from an entire foam-rolling session, simply because it targets the thoracic extension a roller can't reach at that angle. Start there before anything else, and the rest of the routine gets noticeably easier within the first week.